

by guest author Mat “Role Play Chat” Copelli
In this article we talked about the importance of using handouts in your tabletop RPG sessions. Today, I’d like to share with you a step-by-step process for making your own wax sealed letter. These straightforward Character handouts are something I often use my games to add a little extra flair to any letter or note that players may receive from an NPC or when they are digging through a villains desk. This handout is relatively simple to do, requires little to no artistic talent and you won’t need any special equipment. I recently ran the Call of Cthulhu adventure “Edge of Darkness” that contains a letter that the players acquire. Using the text from that letter, I decided to make my own handout for my table. I have catalogued my creation of one of these handouts in order to demonstrate the process I followed!
The equipment you will need:
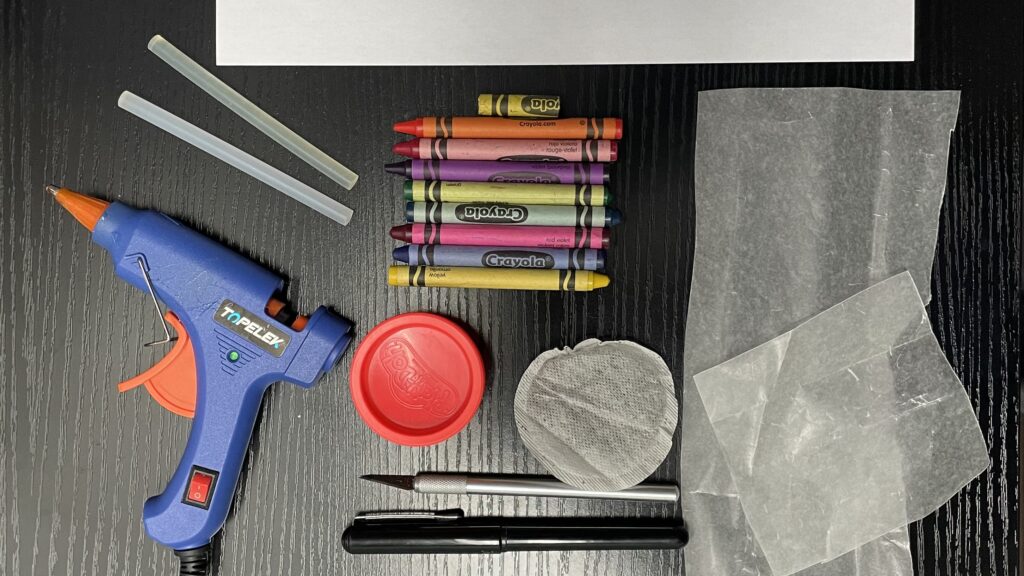
- Parchment Paper
- Wax crayons
- Paper
- A hot glue gun (with glue)
- A hobby knife
- A pen
- Tea & kettle
- Play dough
You may also want
- Metallic paint (gold or silver)
- A small paint brush
- Buttons
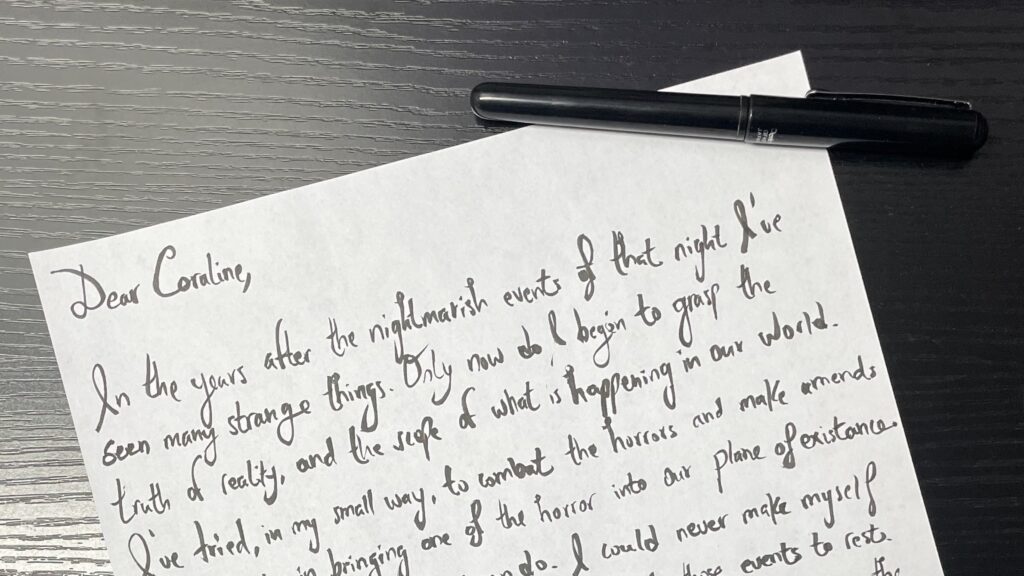
STEP 1 Write the letter
While it sounds obvious, the first thing you will need to do is write out the letter you intend to give to your players. It can be on any kind of paper, but I recommend using cheap printer paper. You may also consider printing the letter but I prefer to handwrite mine. Be sure to use a pen that has ink that is waterproof. I’m partial to using brush pens by Pentel or Sakura that have archival quality ink.
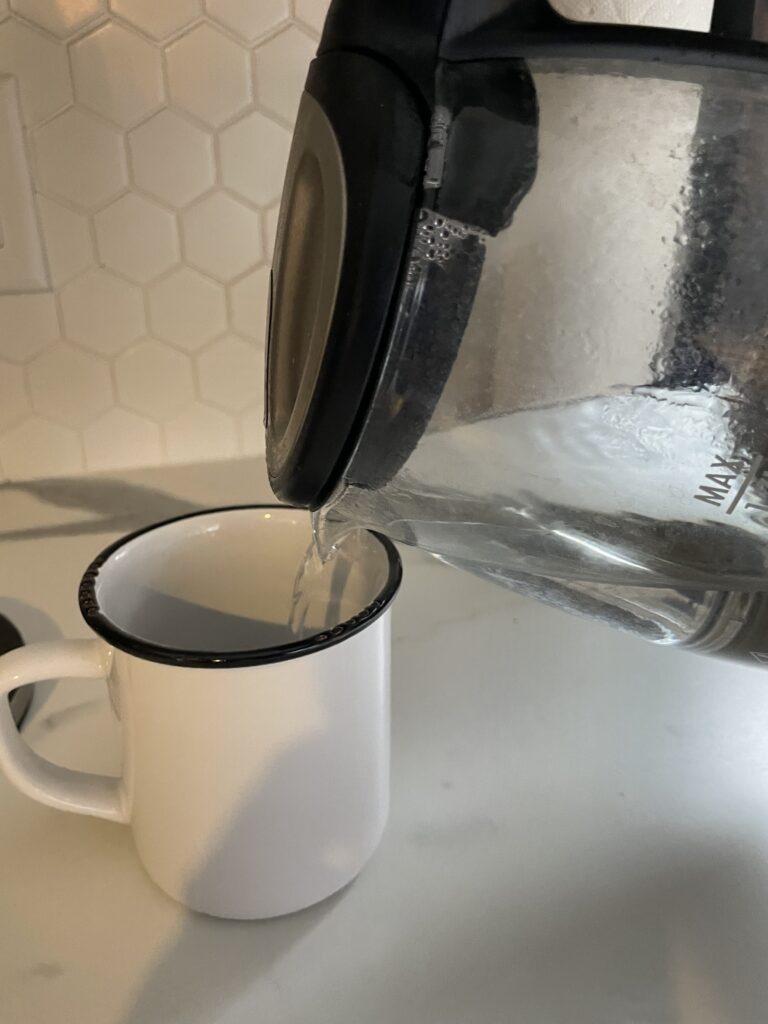
STEP 2 Make tea
Boil water and make yourself a half cup of black tea. Any kind will do. Let it steep for roughly 4 to 5 minutes. You want the tea to be strong!
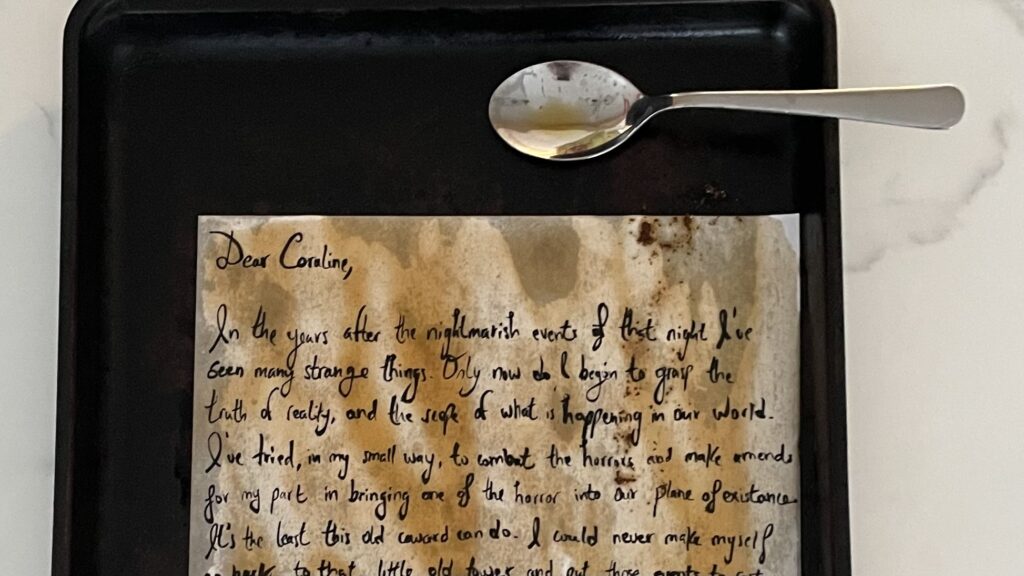
STEP 3 Stain the letter
Place the letter on a cookie sheet (or any surface you don’t mind getting wet) and pour some of the tea onto the letter. You will also want to dab the letter with the tea bag in some areas. This will ensure that various shades of tint occur on the page. You can also pinch or fold some parts of the page if to add even more texture to the letter. Don’t overdo this though, you don’t want the letter to be illegible!
Once done, drain out excess water from the cookie sheet and leave the letter in a sunny spot to dry.
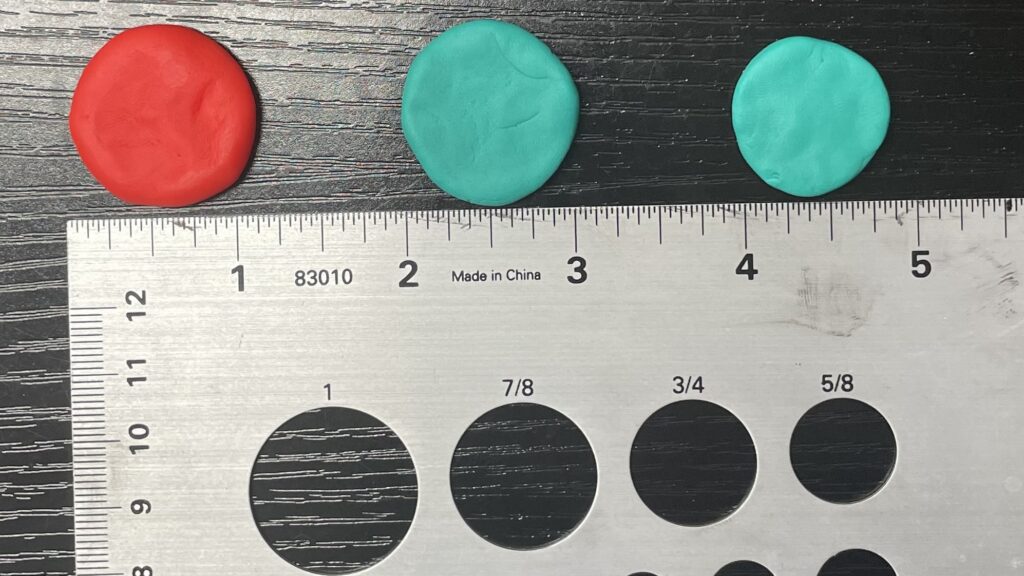
STEP 4 Make the moulds for the wax seals
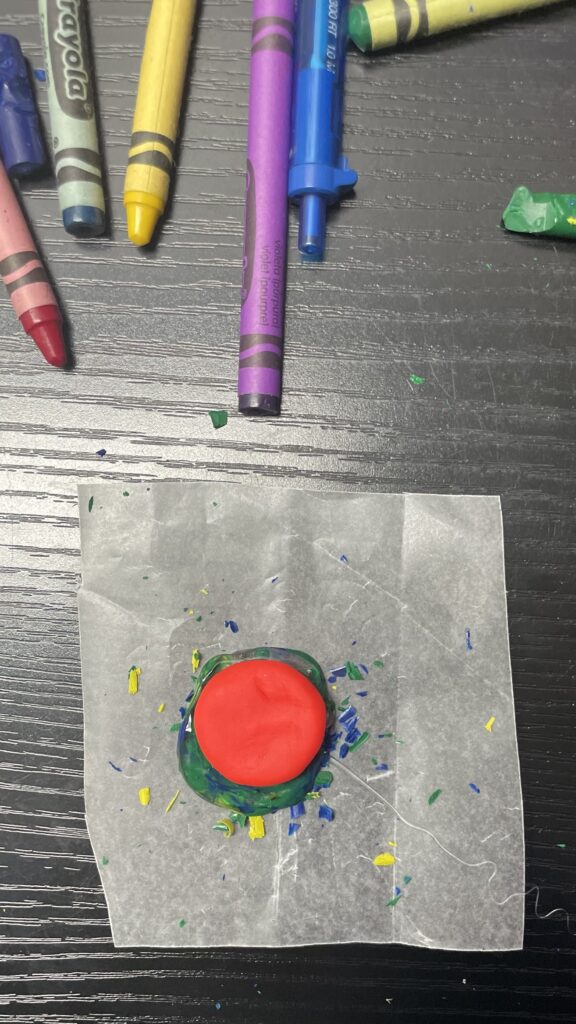
Mould the Play-Dough into small disks. They should be anywhere from one inch to half an inch in diameter and roughly a quarter inch thick. Note that you can make your own Play-Dough with flour salt and water, but I’ve had more consistent results using the brand name stuff.
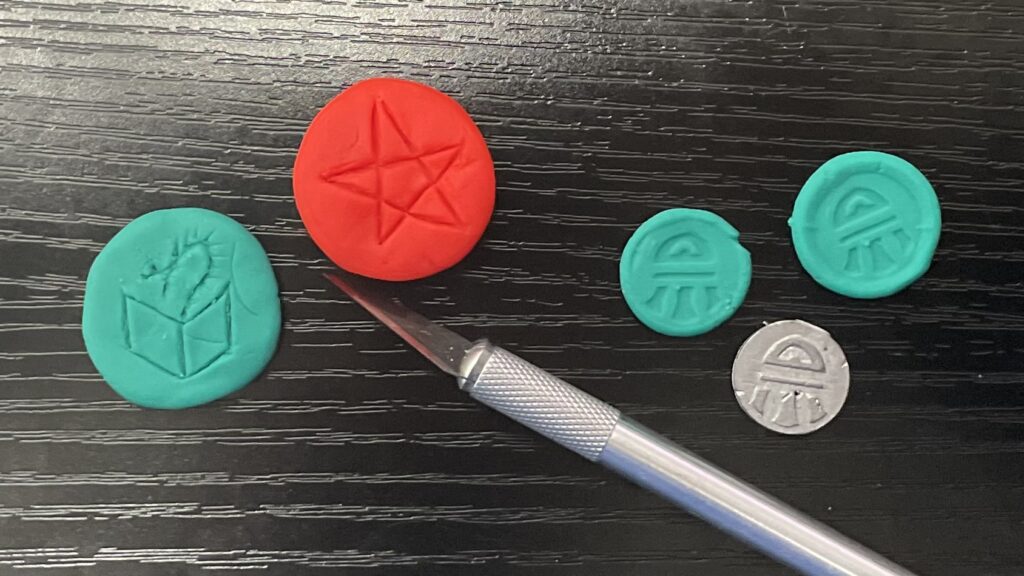
STEP 5 Make the moulds for the wax seals (continued)
Use the hobby knife or a button carve (or press) shapes into the Play-Dough. These shapes will be used to cast your wax seals! Feel free to get creative here!
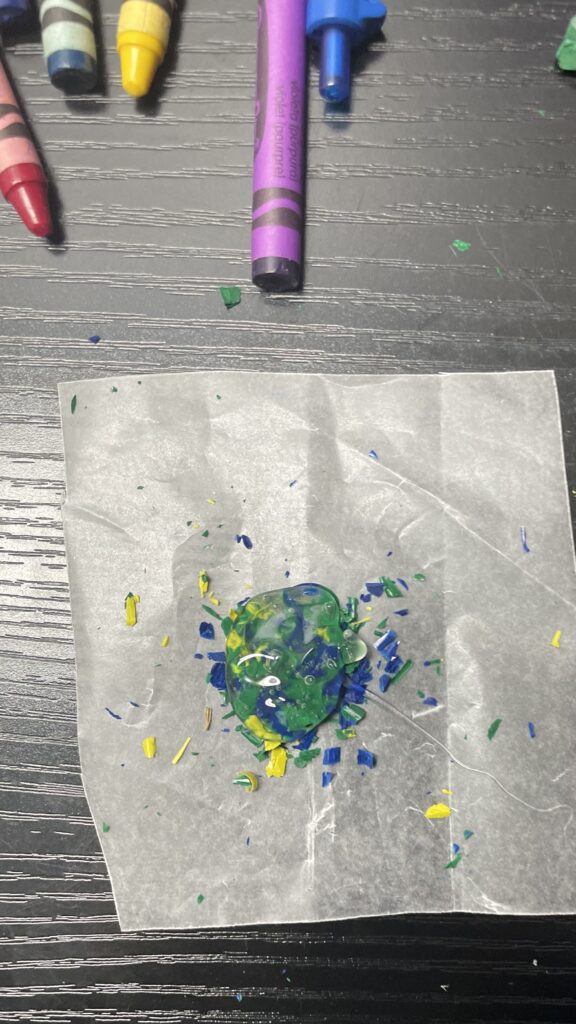
STEP 6 Prepare your colours!
Select two or three different colours of wax crayons and shave off pieces of the wax onto a piece of parchment paper. Create a little pile of wax shavings, roughly the size of the mould you just created in step 4/5. Mix the various colours together so that they are intermingled.

STEP 7 Add hot glue to the wax
Add clear hot glue on top of the pile of wax. You will want to ensure you put enough glue to cover the entire pile and that the glue is HOT, otherwise the wax will not fully melt.
STEP 8 Press in the mould
While the hot glue is still hot, carefully press the mould onto the pile of glue. You will want to do this quickly after completing the step above as you want the hot glue to take on the shape of your mould. Press the disk of play dough until you see hot glue spilling out around the edges of your mould. If this does not occur, you likely put too little hot glue in the previous step. This won’t be an issue, but aesthetically, the seals tend to me more appealing with the edge around them.
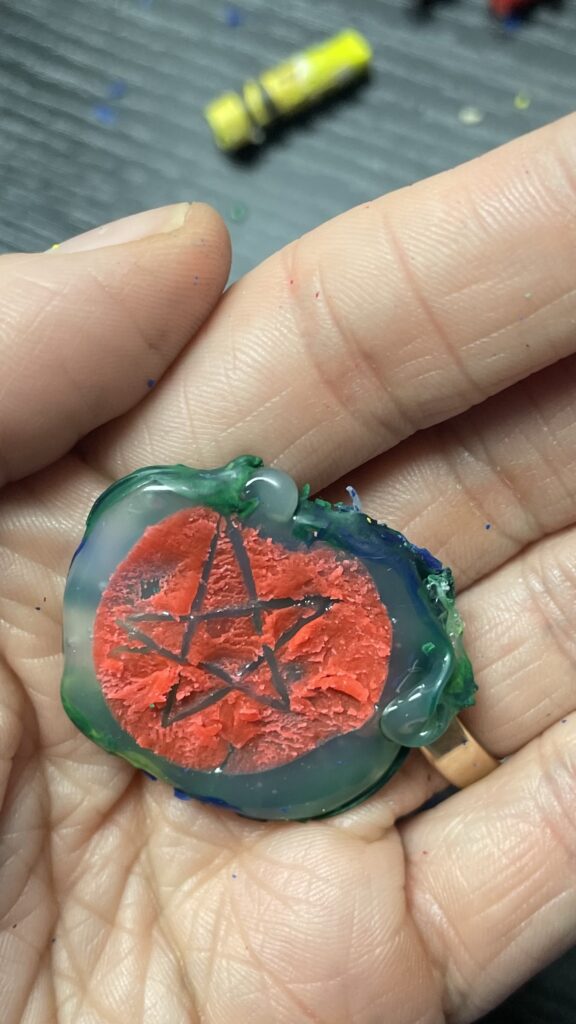
STEP 9 Remove the play dough
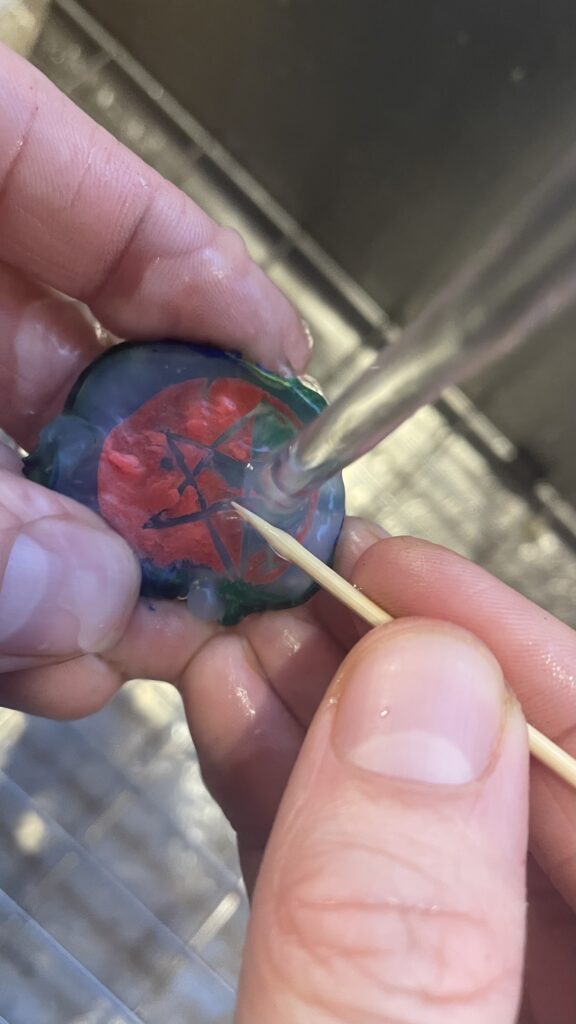
Once the hot glue has dried (roughly a few minutes), remove as much of the play dough as possible by hand. Portions of the play dough may remain stuck in the details of your seal. That is normal. To remove it, use water and cleaning instrument (like a tooth pick, corner of a sponge or an old paint brush).
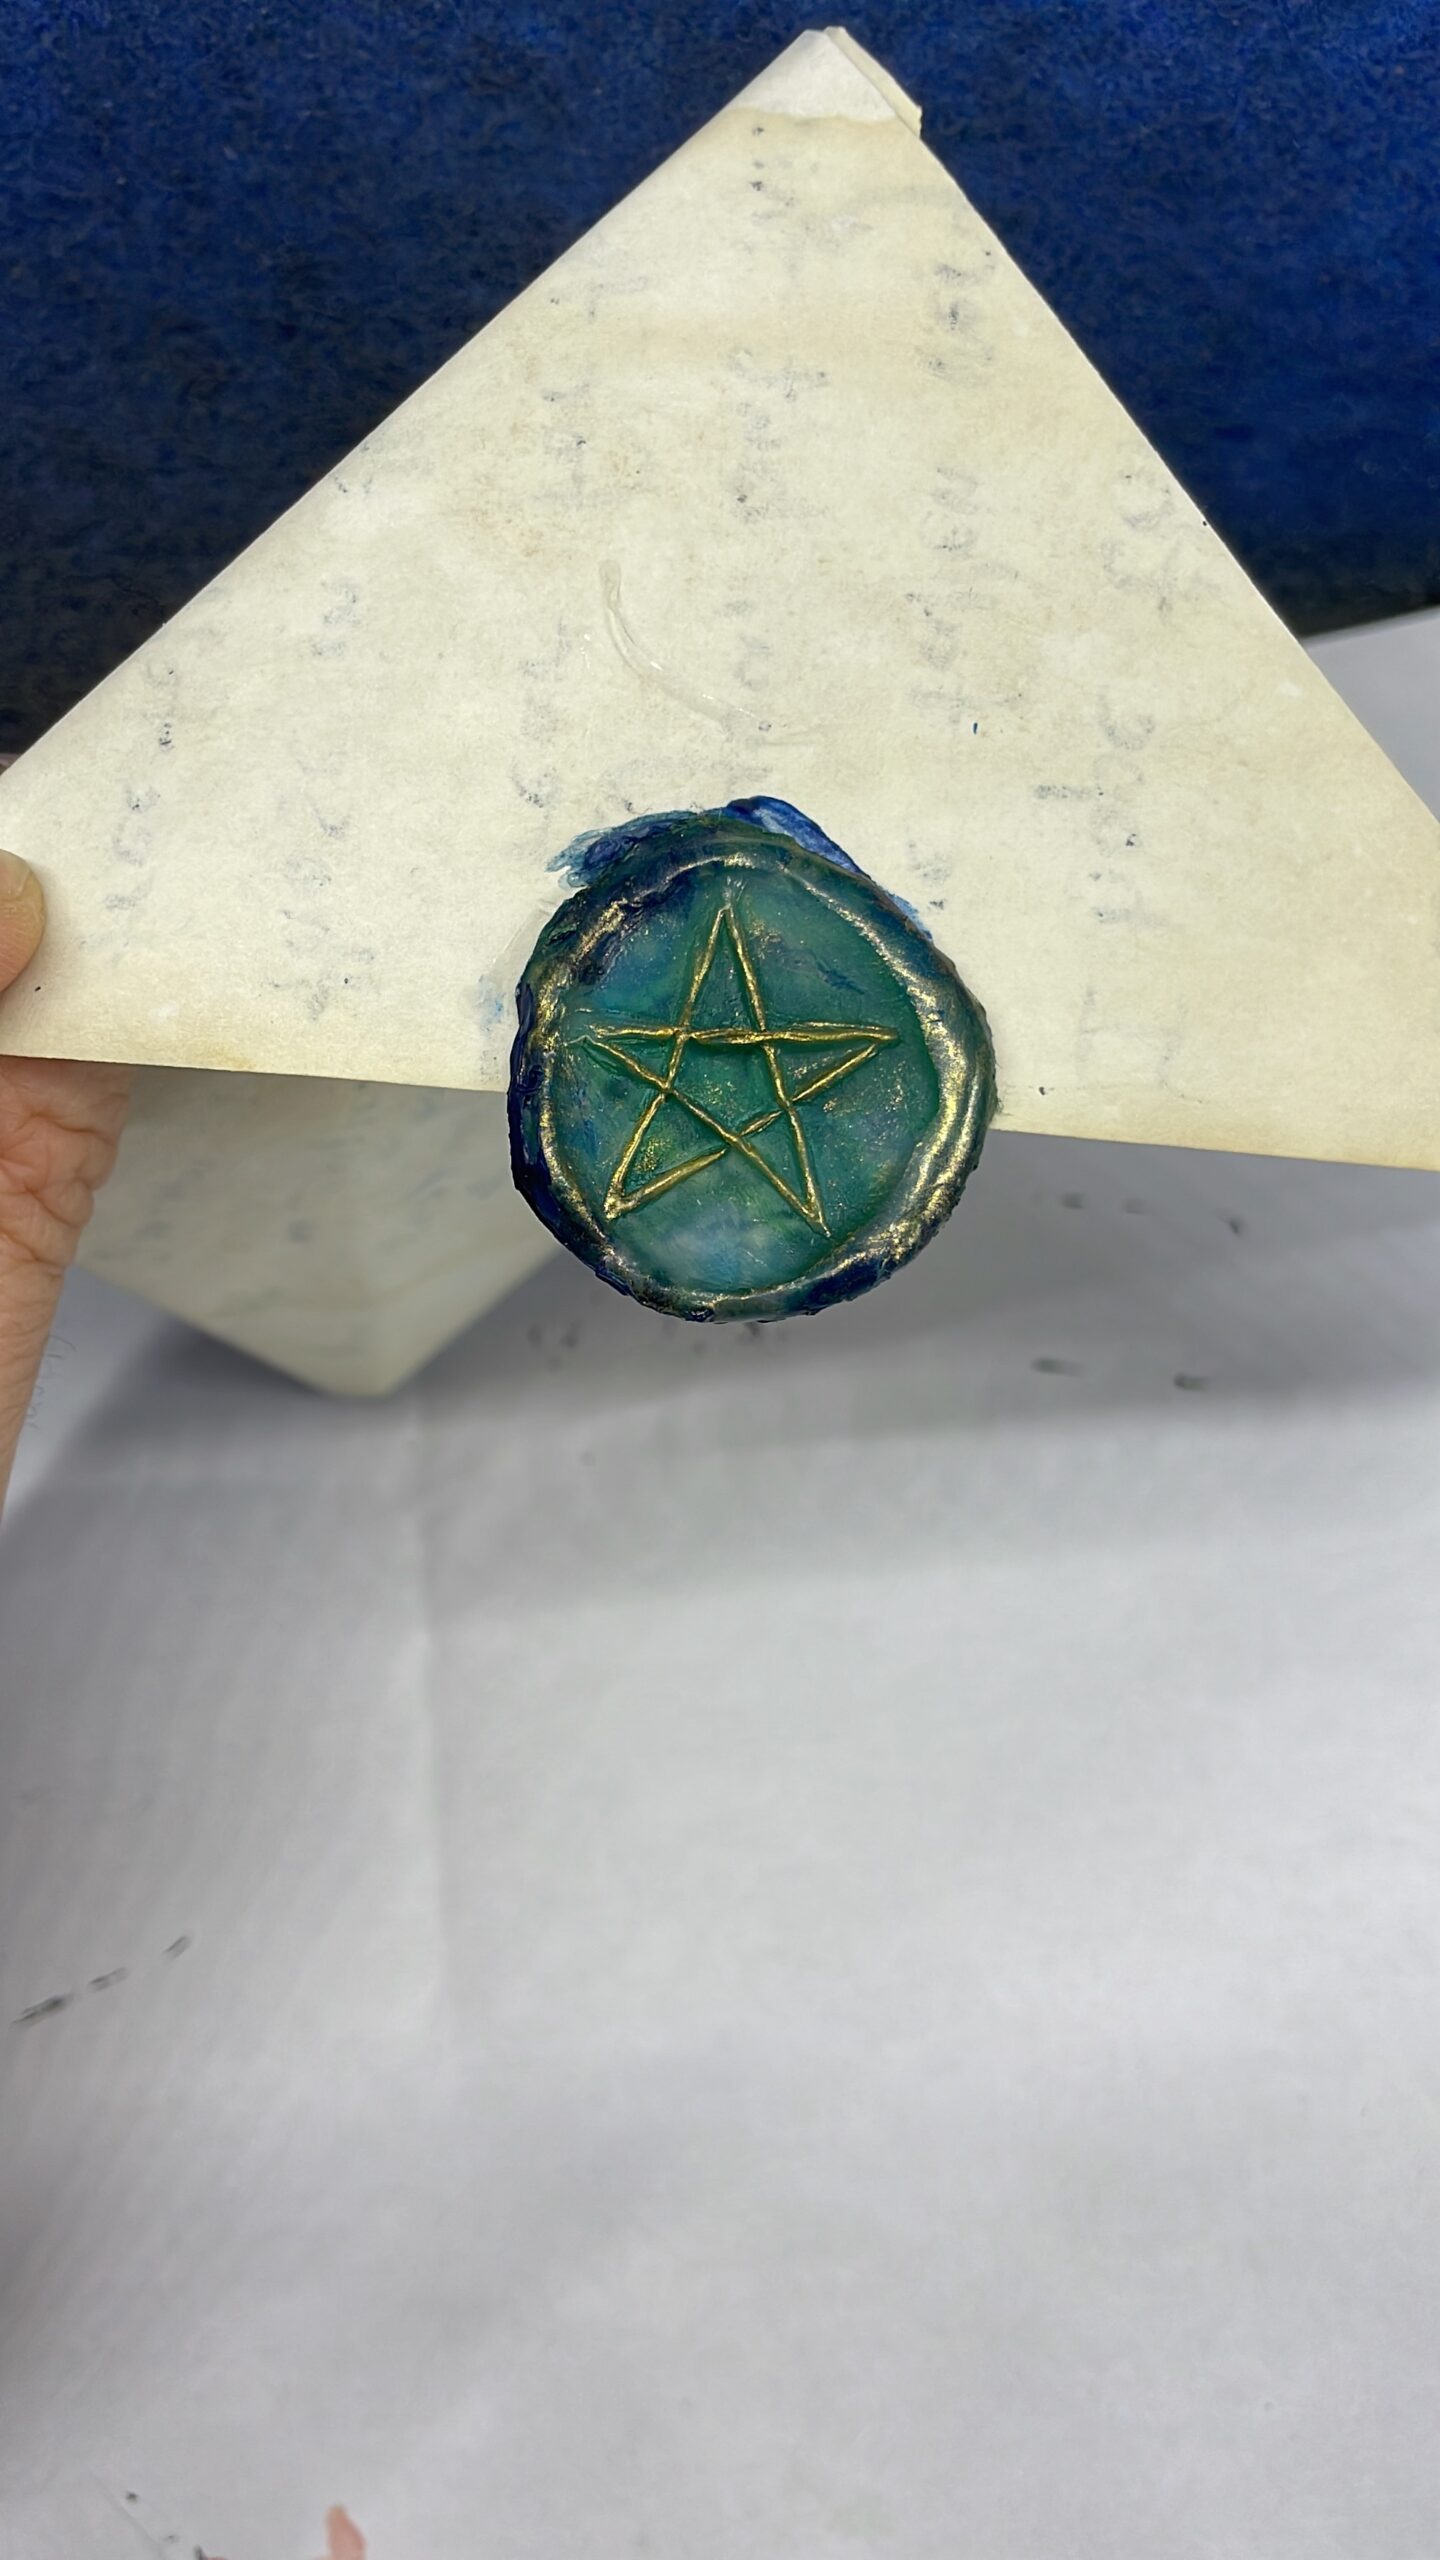
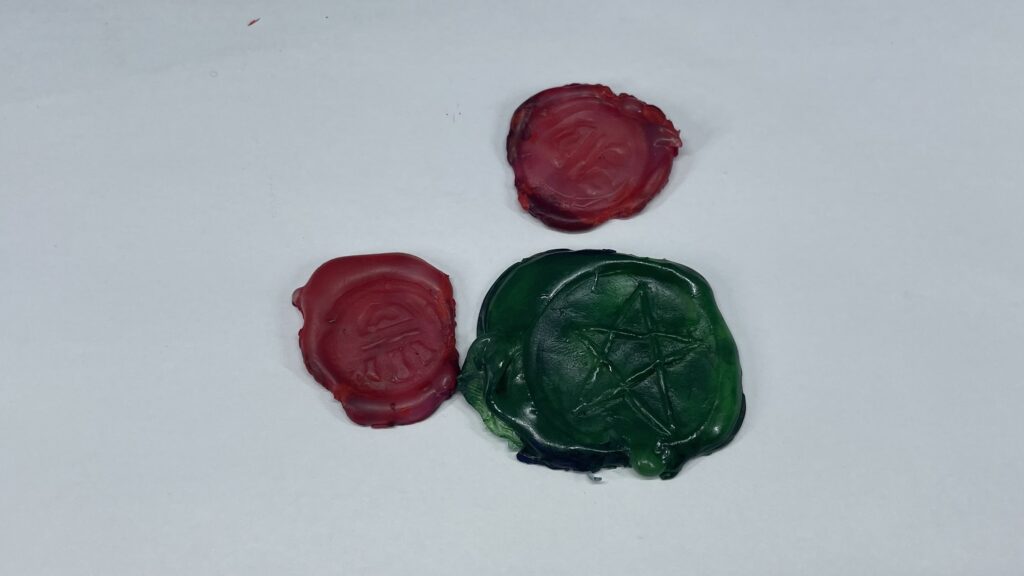
STEP 10 Adding Colour
It is possible that you used too little wax in step 6 resulting in your wax seals being colourful on the backside but translucent on the front. Like in this photo:
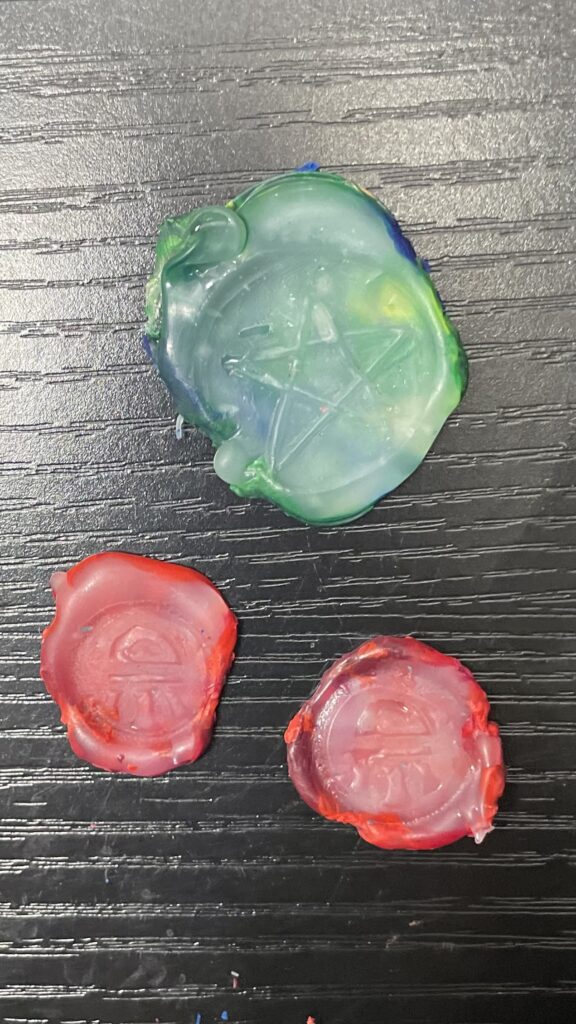
If that’s the case, you may consider adding some paint to the seal. Be sure to water the paint down, to the consistency of milk, before adding a generous amount to your seal.
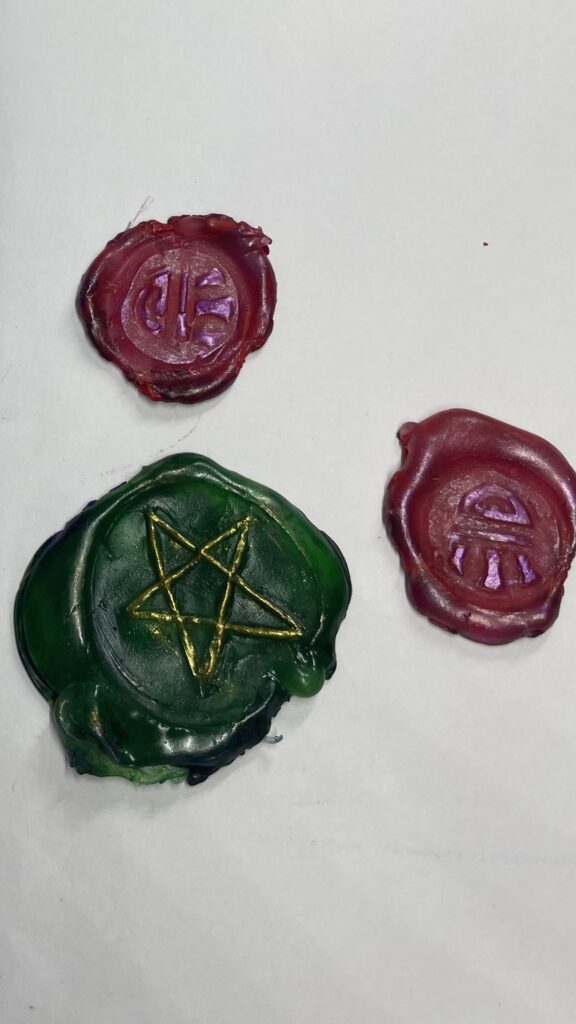
STEP 11 Adding added details
You can also consider dry brushing on an accent colour. I like using metallic paints for this, like a bright gold or a shining silver. Less is more here, you don’t want to make the seal too sparkly, but rather just enough to catch the light at your table when the handout is delivered.
STEP 12 Glue the seal on
Fold your letter and glue the seal onto it! Be wary that your player will have to rip the seal off. You may want to consider using an envelope or only gluing one half of the seal into place.

I hope you enjoyed this quick tutorial and would love to hear about the letters and notes you’ve given to your players!